High-Protein Sweet & Sour Chicken – Easy Recipe for Efficient Meal Prep Throughout the Week

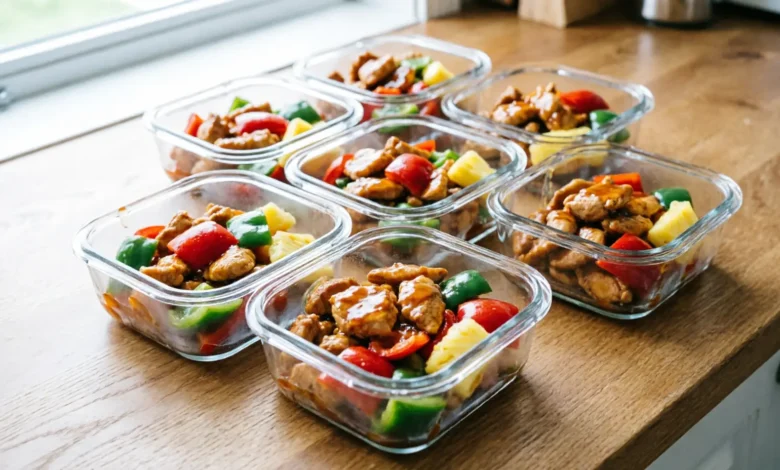
Forget about boring chicken breast with dry rice for each meal Monday through Friday. You can eat something that will satisfy both your taste buds and your fitness goals. Our recipe will allow you to prepare healthy and flavorful sweet and sour chicken which won’t break the bank and will work perfectly for your week ahead.
This particular meal prep will require some effort during the chopping process; however, cooking itself is rather quick and simple. This is the most detailed recipe you will ever need for preparing sweet and sour chicken.
Preparation of Perfect Basmati Base
The rice is an important component that will make or break the dish. In order to achieve a perfect base, we opt to use the simmer cooking technique that guarantees individuality of each grain of rice.
Basmati Rice Preparation: 14 Minutes Simmering Technique
You will require 300 grams of basmati rice for this recipe. Before proceeding, wash the rice thoroughly under a running water using a fine-mesh strainer. This is done to remove excess starch from the rice, which prevents it from becoming sticky. Mix 300 grams of rice with 600 ml of cold water and a few flakes of sea salt.
Stir the mixture well to eliminate any lumps. Then place the mixture into boiling water over high heat and bring it to a boil. After boiling, cover the pot with a lid and reduce the temperature of the stove to low. Let it simmer for 14 minutes without removing the lid.
Resting and Fluffing for Perfect Texture
With the timer now at 14 minutes, switch off the stove. The lid remains closed for 4 more minutes. This is the resting process, which helps in even distribution of moisture. This is how you get the light, fluffy texture in restaurants.
Now open the lid and fluff the rice using a fork or spatula. Start from the sides and work your way towards the center. This helps separate the grains. Set the rice aside as you prepare the chicken and veggies.
Preparing the Vegetables for Flavor Basis
The vegetables offer both crunch and vibrant colors in order to give an impression of freshness in the recipe. It is essential to prepare the ingredients properly to ensure that they cook evenly.
How to Slice the Bell Peppers
Start by getting three bell peppers (capsicums). Split the peppers in half and remove the seeds and inner white part using your fingers. Knock the peppers against the kitchen benchtop to dislodge any stubborn seeds.
Next, cut the peppers into strips. Turn the strips by 90 degrees before cutting them into large cubes. Place these in a large mixing bowl.
Preparation of Onions and Aromatics Paste
One brown or yellow onion is needed. Both ends should be chopped off, followed by peeling off the outer covering. The discarded pieces may be stored in the freezer for future use in making vegetable broth.
Onions should be placed in a half moon shape on the chopping board, and then should be cut thin across. To prevent getting your fingers cut, cut about 3/4 across. Add the onions to the peppers in the bowl. Separate the onion layers using your hands.
For preparing the aromatics paste, four garlic cloves and 15g of ginger should be finely grated in a microplane.
Signature High-Protein Chicken Recipe
The objective is to brown the meat while not overcooking it. This way, your chicken remains moist when you reheat it later during the week.
Chicken Cutting to Cook Evenly
Start with 1.4 kg of chicken breast meat, which is leaner. You can use chicken thighs if you like it with more fat content. Cut the chicken breasts into slices first.
Turn the slices 90 degrees and chop them into big, uniform chunks. Consistency is crucial; otherwise, some smaller pieces will be completely dried out, while other larger ones might still be undercooked.
Seared Texture Technique
Heat the large pot or pan to high temperature using 30ml of grapeseed oil. Any neutral oil capable of withstanding high temperatures would work just fine. Add the onion and bell pepper slices, together with a sprinkling of sea salt. Cook for approximately four minutes, ensuring that the bell peppers develop a slight char and caramelized onions.
Drain the vegetables and place them in a separate bowl. Wipe the cooking surface if necessary and pour another 20ml of oil into the heated pan. After heating the oil for a few seconds, place the chicken pieces in the pan and sprinkle some salt. Ensure that there is enough space between the chicken pieces for even cooking.
Sear for three minutes without stirring to form a crust on the meat pieces. Stir the chicken pieces and cook for another three minutes. Drain any moisture from the pan because retaining the water may result in steamed chicken.
Introducing Aromatics and Merging Ingredients
Add the garlic and ginger paste to the chicken and stir-fry for 45 seconds. You don’t need to cook these ingredients too much; you only need to enhance their flavor without burning the garlic.
Then add the sautéed vegetables back to the pan and toss all the ingredients for about 30-40 seconds to allow their flavors to merge before adding the sauce.
Sweet and Sour Sauce Consistency Recipe
A good sweet and sour sauce requires a combination of saltiness, sweetness, and acidity. In this recipe, we use honey rather than white sugar.
Blend of Umami Ingredients for the Sauce
Place all these ingredients in a blender:
- 125ml Low Sodium Soy Sauce
- 80ml Pineapple Juice from Store-Bought Cans
- 80g Honey
- 40ml Worcestershire Sauce
- 40ml Apple Cider Vinegar or White Vinegar
- 40ml Tomato Sauce or Ketchup
- 12g Cornflour
Freshly squeezed pineapple juice should not be used because the enzymes present in the fresh fruit dissolve cornflour. As a result, the sauce will not thicken but remain runny. Mix the ingredients thoroughly until cornflour is completely disso
The Sauce: Creating the Ideal Glaze
Just before adding the sauce to the pan, give it a final stir. There is usually cornflour settling at the bottom of the saucepan. Pour the sauce over the chicken and vegetables.
Boil until the sauce turns into a glossy, sticky glaze. This should take approximately 2 minutes while stirring the mixture constantly. The high temperature triggers the transformation of the mixture.
Add one tablespoon of sesame seeds just before serving if you want to create an authentic Chinese dish. Switch off the stove when the process is done.
Portioning, Storage, and Eating
Lastly, you need to portion everything out so that you don’t have to do anything else for the rest of the week.
Tips on Serving and Portioning
For easy meal planning, portion out your cooked chicken and veggies into five servings. Add the fluffy basmati rice to your serving containers first, and then place the chicken pieces over them. If you have any extra sauce left in the pan, pour it on top of your meal.
As garnishes, use:
- Sliced spring onions
- Chopped chili
- More sesame seeds
Longevity of Meal Prep Containers
Keep these in the refrigerator up to four days if you do not need it for long. You could even freeze these up to four months if you wish to keep these for longer.
If you are using vacuum-sealed containers, you could take out all the air inside the box. This will minimize oxidation and increase the shelf life by one day in the refrigerator.
Final Thoughts
Preparing high-protein food can be fun. With the sweetness of the chicken, not only will you save money, but you’ll be adding tons of flavor too. This is made possible through tricks like cooking the rice for 14 minutes and searing the chicken in one go.
With this system, preparing your meals should be a breeze. All you need to do is chop some veggies, sear the protein, and make your glaze. Start your week right by doing your meal prep now.
